Setting up motion detection
The SW360 app can automatically start a recording when it detects movement. In this article you can read how you can set up the app for this.
Push notifications
In addition to start a recording, the app is also able to send out push notifications and email notifications when the camera detects movement.
Have you set up motion detection correctly, but are you still not receiving push notifications? Please check "Why am I not receiving push notifications on my phone/tablet?"
| What is motion detection? |
Cameras use software-based motion detection. The camera image is converted to pixels. When these pixels change colour, the camera sees this as movement.
This means that the camera also respond to changes in light or reflections, such as when headlights of a passing car shine into the camera, or when there is strong wind and leaves of trees move as a result.
If you let a camera look through a window, reflections on the glass might also be seen as movement.
The higher you set the sensitivity of the motion detection, the fewer pixels will need to change in colour before the camera sees this as movement.
|  |
| Setting up motion detection in the SW360 app |
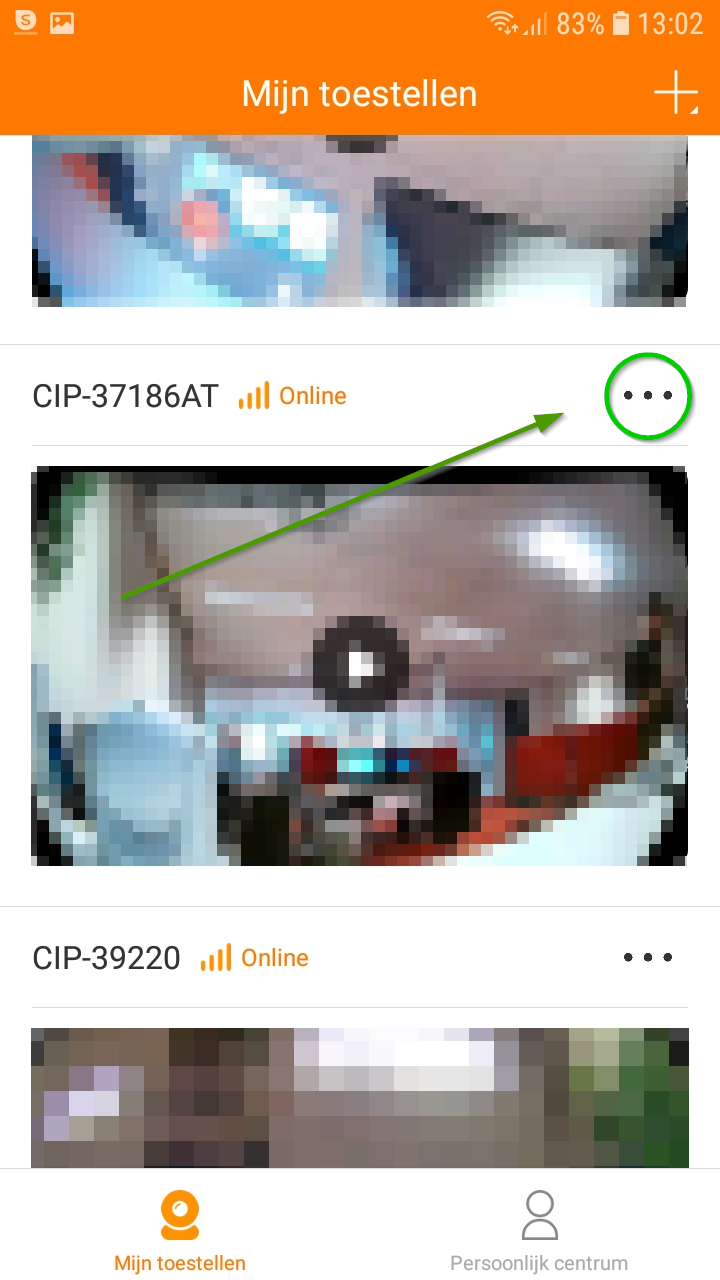
- Open the SW360 app and in the overview, look for the camera of which you would like to set up motion detection.
- Select the three dots on the top right of the camera feed
|  |
- A menu of options will appear
- Select Settings
|  |
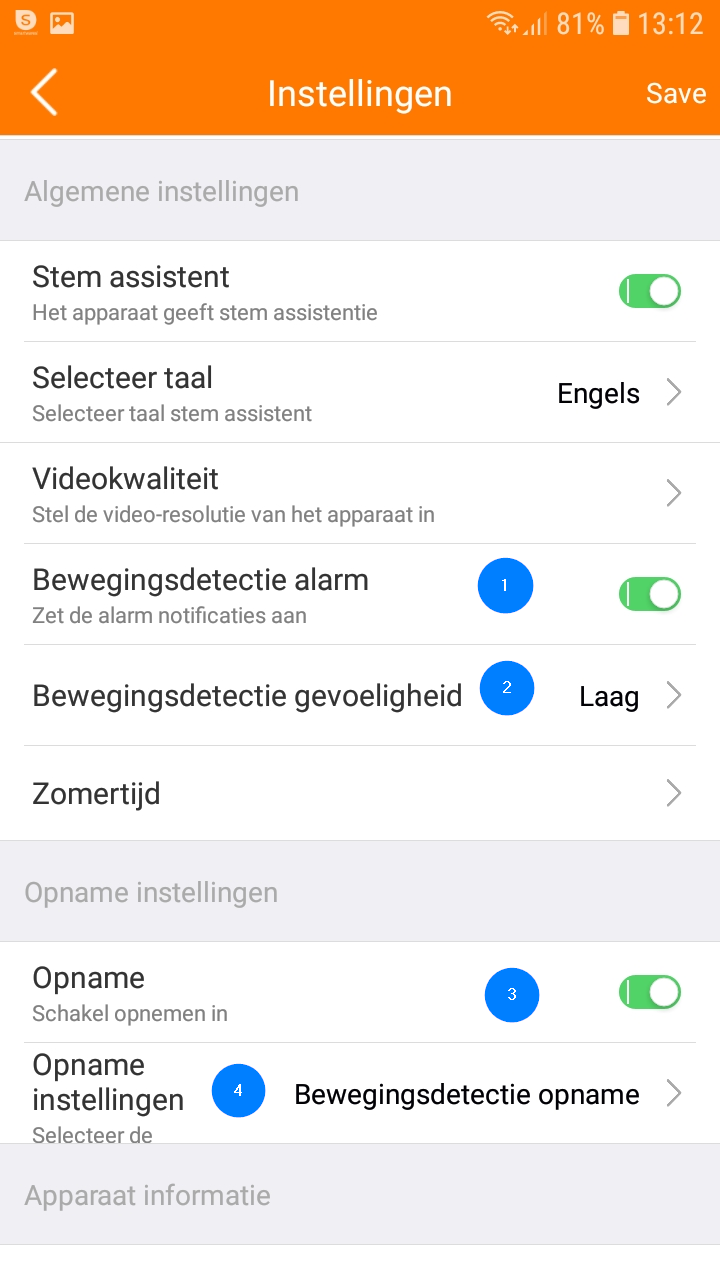
- Motion detection alarm
Enable this setting to receive push notifications on your phone or tablet when motion is detected.
- Motion detection sensitivity
If the motion detection is not sensitive enough, no movement will be detected by the camera.
How the sensitivity should be set up, totally depends on the environment in which the camera is placed.
For example, if you live on a busy road where many cars pass, it is not desirable to receive a push notification for every passing car. In this case you will probably have to lower the motion detection sensitivity.
The darker the environment, the higher the sensitivity is likely to be set.
Do not forget to save the settings after adjusting the sensitivity.
- Recording
If you enable this setting, the camera will record the images. These images are saved to the camera's SD card.
See point 4 below on how to set up when the camera should record.
- Recording settings
With this setting you can determine when you want the camera to record images. You can choose from:- Motion detection recording
With this setting, the camera starts recording automatically when it detects motion.
- Continuous recording
With this setting, the camera will record continuously.
|  |

